컨트롤러에서 DB를 직접 관여하지 않고,
UserDAO (Repository)를 통해 DB를 조작하였다.
@Controller - Presentation Layer
@Repository - Persistence Layer(영속계층), Data access Layer
컨트롤러는 DB 조작 없이 본연의 역할에 집중하도록 관심사를 분리한 것이다.
사용자의 이력을 다루게 되었다
컨트롤러에서 Dao를 주입한다
회원가입 할 때 사용자의 이력까지 다루는 것은 비즈니스 로직이다. (컨트롤러 내, DAO 내에도 위치하면 X)
비즈니스 로직을 담당할 객체를 하나 더 만들어야 한다.

비즈니스로직의 메소드명은 업무 용어와 같다.
(UserDao의 메소드는 SQL적)
트랜잭션을 비즈니스 계층에 적용한다
회원 가입, 유저 이력까지 확인하는 작업 두 가지가 묶여서 진행되어야하기 때문이다.
@Controller
@Service
@Repository
이 세 개 모두 @Component 어노테이션을 포함하고 있기 때문에
컴포넌트 스캔으로 자동 스캔이 다 된다.
메소드마다 하나의 커넥션을 만들어서 DB에 접근한다.
트랜잭션은 한 개의 커넥션에서 이루어지는데,
만약 DeleteUser를 두 번 호출했다면, 각 두 번의 커넥션이 만들어진다.
그렇다면 두 개를 TX으로 묶을 수 없다.
그렇다면 DeleteUser가 하나의 커넥션을 쓸 수 있도록 한다.
그러므로 필요한 것이 트랜잭션 매니저이다.
같은 트랜잭션에 있는 명령들은 같은 커넥션을 쓰게 해주는것이 매니저의 역할이다.
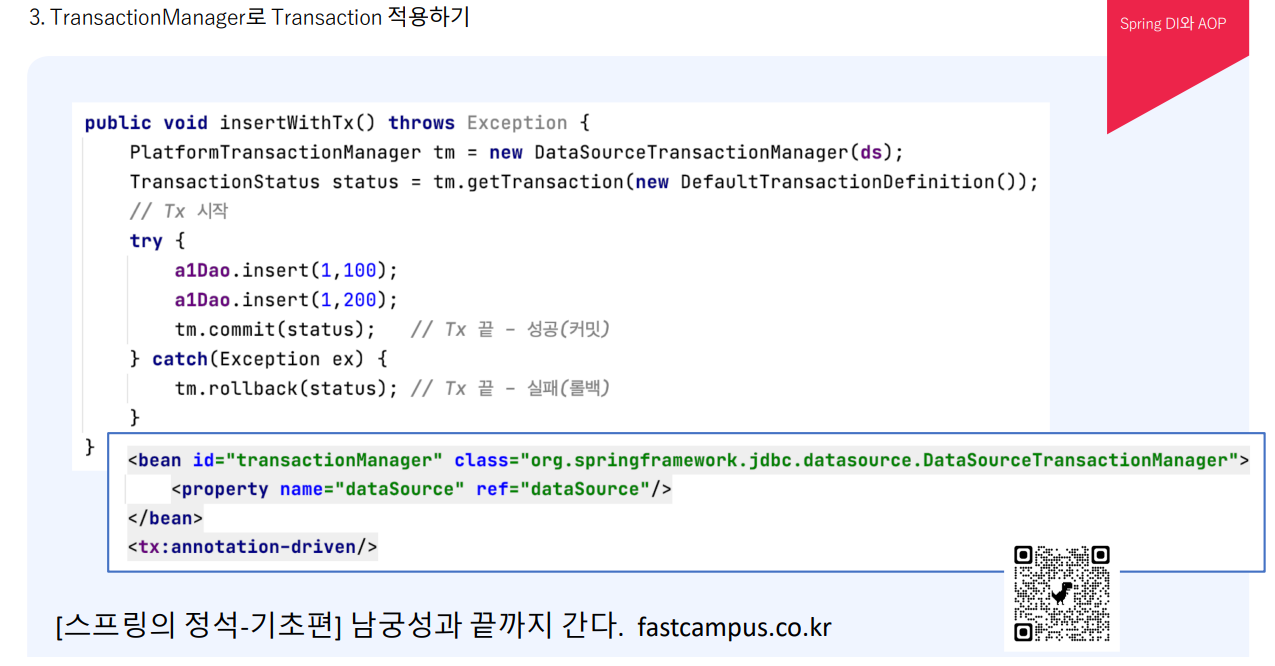
위 상자는 트랜잭션 매니저를 직접 만드는 방법,
아래 상자는 트랜잭션 매니저를 빈으로 등록하는 방법
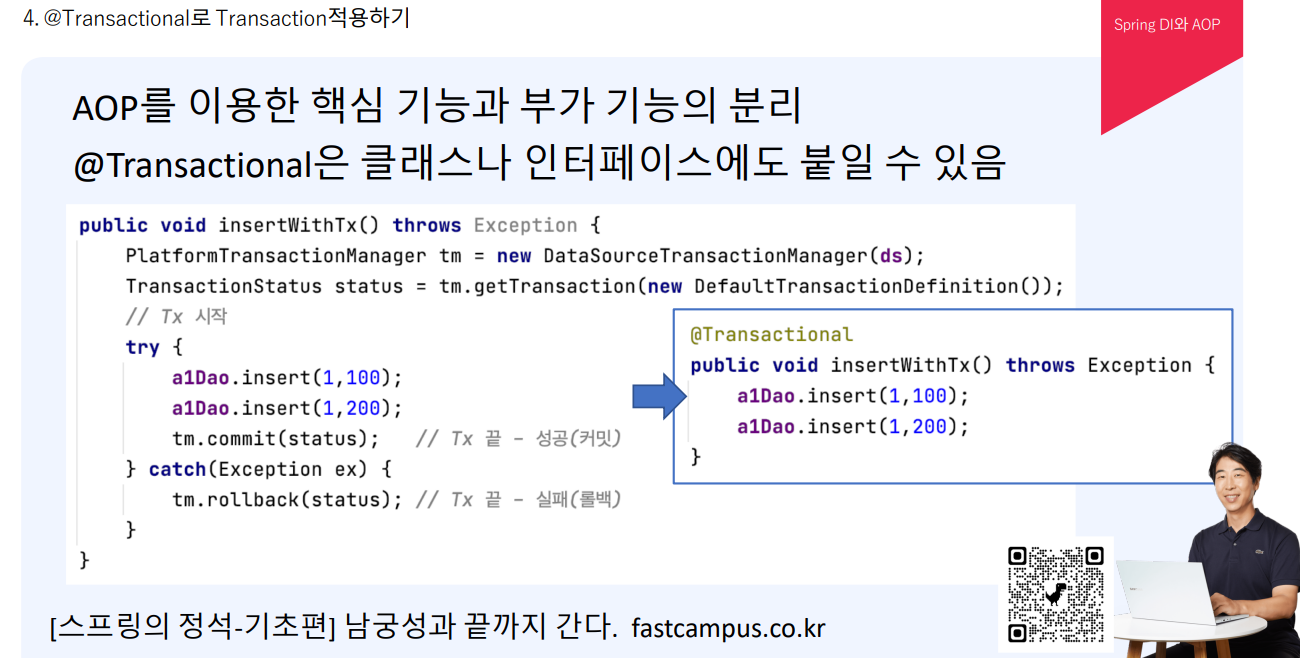
@Transactional은 AOP를 이용하여 핵심 기능과 부가기능을 분리한다.
AOP : 자동 코드 추가
try 안의 코드 두줄이 핵심 코드
위 아래의 코드가 부가 기능
핵심코드와 부가 기능이 섞여있는데,
이를 AOP를 이용하여 분리한 것이 오른쪽 상자이다.
위 아래로 있던 부가기능이 사라졌다.
우리는 핵심 로직에만 집중하면 된다.
@Transactional만 사용하면 AOP가 부가기능을 자동으로 넣어준다.
그렇게 되면 오른쪽 상자가 위, 아래 부가기능이 추가된 채로 작동이 된다.
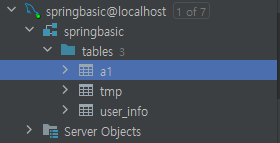
table a1을 만들어주었다.
이 a1에 접근하기 위한 Dao를 만들어준다.
      <code />


      package com.fastcampus.ch3;

import org.springframework.beans.factory.annotation.Autowired;
import org.springframework.stereotype.Repository;

import javax.sql.DataSource;
import java.sql.Connection;
import java.sql.PreparedStatement;
import java.sql.SQLException;

@Repository
public class A1Dao {

    @Autowired
    DataSource ds;

    public int insert(int key, int value) throws Exception{
        Connection conn = null;
        PreparedStatement pstmt = null;

        try {
            conn = ds.getConnection();
            pstmt = conn.prepareStatement("insert into a1 values(?,?)");
            pstmt.setInt(1,key);
            pstmt.setInt(2,value);

            return pstmt.executeUpdate();
        } catch (SQLException e) {
            e.printStackTrace();;
        } finally {
            close(conn,pstmt);
        }
        return 0;
    }

    private void close(AutoCloseable... acs) {
        for(AutoCloseable ac :acs)
            try { if(ac!=null) ac.close(); } catch(Exception e) { e.printStackTrace(); }
    }
}
테스트 코드를 만들어준다.
<code />
package com.fastcampus.ch3;
import org.junit.Test;
import org.junit.runner.RunWith;
import org.springframework.beans.factory.annotation.Autowired;
import org.springframework.test.context.ContextConfiguration;
import org.springframework.test.context.junit4.SpringJUnit4ClassRunner;
import static org.junit.Assert.*;
@RunWith(SpringJUnit4ClassRunner.class) //ac를 자동으로 만들어줌
@ContextConfiguration(locations = {"file:src/main/webapp/WEB-INF/spring/**/root-context.xml"}) //xml 경로 지정해주기
public class A1DaoTest {
@Autowired
A1Dao a1Dao;
@Test
public void insertTest() throws Exception{
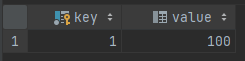
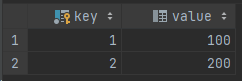
a1Dao.insert(1,100);
a1Dao.insert(2,200);
}
}
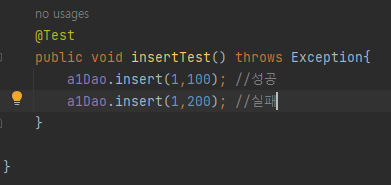
두 개 전부 다 성공할 때만 데이터가 들어가게 하고 싶다.
둘 중에 하나 실패하면 들어가지 못하게 하고 싶다.
이때 해주면 될 것이 트랜잭션이다.
      <java />


      @RunWith(SpringJUnit4ClassRunner.class) //ac를 자동으로 만들어줌
@ContextConfiguration(locations = {"file:src/main/webapp/WEB-INF/spring/**/root-context.xml"}) //xml 경로 지정해주기
public class A1DaoTest {

    @Autowired
    A1Dao a1Dao;

    @Autowired
    DataSource ds;

    @Test
    public void insertTest() throws Exception{
        //TxManager를 생성
        PlatformTransactionManager tm = new DataSourceTransactionManager(ds);
        TransactionStatus status=tm.getTransaction(new DefaultTransactionDefinition());
        //Tx 시작
        try {


            a1Dao.insert(1,100);
            a1Dao.insert(1,200);
            tm.commit(status); //성공하면 커밋
        } catch (Exception e) {
            e.printStackTrace();
            tm.rollback(status); //예외가 발생하면 롤백
        } finally {
        }
    }

}
트랜잭션 매니저를 추가해줌으로써 A1Dao 수정
      <code />


      @Repository
public class A1Dao {

    @Autowired
    DataSource ds;

    public int insert(int key, int value) throws Exception{
        Connection conn = null;
        PreparedStatement pstmt = null;

        try {
//            conn = ds.getConnection();
            conn= DataSourceUtils.getConnection(ds);

            pstmt = conn.prepareStatement("insert into a1 values(?,?)");
            pstmt.setInt(1,key);
            pstmt.setInt(2,value);

            return pstmt.executeUpdate();
        } catch (SQLException e) {
            e.printStackTrace();;
        } finally {
//            close(conn,pstmt); //커넥션을 닫으면 트랜잭션이 종료되므로
            close(pstmt); //pstmt만 닫는다
            DataSourceUtils.releaseConnection(conn,ds); //트랜잭션매니저가 close할지 말지 알아서 판단
        }
        return 0;
    }
delete가 되지 않아서 에러가 발생하므로
A1Dao.java에
deleteAll()메소드 추가
      <code />


      public void deleteAll() throws Exception{
    Connection conn = DataSourceUtils.getConnection(ds); //deletAll은 Tx와 별개로 동작하므로, Connection conn = ds.getConnection();으로 해야한다
    String sql="delete from a1";
    PreparedStatement pstmt = conn.prepareStatement(sql);
    pstmt.executeUpdate();
    close(pstmt);
}
      <java />


      package com.fastcampus.ch3;

import org.junit.Test;
import org.junit.runner.RunWith;
import org.springframework.beans.factory.annotation.Autowired;
import org.springframework.jdbc.datasource.DataSourceTransactionManager;
import org.springframework.test.context.ContextConfiguration;
import org.springframework.test.context.junit4.SpringJUnit4ClassRunner;
import org.springframework.transaction.PlatformTransactionManager;
import org.springframework.transaction.TransactionStatus;
import org.springframework.transaction.support.DefaultTransactionDefinition;

import javax.sql.DataSource;

import static org.junit.Assert.*;
@RunWith(SpringJUnit4ClassRunner.class) //ac를 자동으로 만들어줌
@ContextConfiguration(locations = {"file:src/main/webapp/WEB-INF/spring/**/root-context.xml"}) //xml 경로 지정해주기
public class A1DaoTest {

    @Autowired
    A1Dao a1Dao;

    @Autowired
    DataSource ds;

    @Test
    public void insertTest() throws Exception{
        //TxManager를 생성
        PlatformTransactionManager tm = new DataSourceTransactionManager(ds);
        TransactionStatus status=tm.getTransaction(new DefaultTransactionDefinition());
        //Tx 시작
        try {
            a1Dao.deleteAll();
            a1Dao.insert(1,100);
            a1Dao.insert(2,200);
            tm.commit(status); //성공하면 커밋
        } catch (Exception e) {
            e.printStackTrace();
            tm.rollback(status); //예외가 발생하면 롤백
        } finally {
        }
    }

}
      <code />


      @Repository
public class A1Dao {

    @Autowired
    DataSource ds;

    public int insert(int key, int value) throws Exception{
        Connection conn = null;
        PreparedStatement pstmt = null;

        try {
//            conn = ds.getConnection();
            conn= DataSourceUtils.getConnection(ds);

            pstmt = conn.prepareStatement("insert into a1 values(?,?)");
            pstmt.setInt(1,key);
            pstmt.setInt(2,value);

            return pstmt.executeUpdate();
        } catch (SQLException e) {
            e.printStackTrace();
            throw e;
        } finally {
//            close(conn,pstmt); //커넥션을 닫으면 트랜잭션이 종료되므로
            close(pstmt); //pstmt만 닫는다
            DataSourceUtils.releaseConnection(conn,ds); //트랜잭션매니저가 close할지 말지 알아서 판단
        }

    }
A1Dao에서
예외처리를 하면서 catch구문에서 예외가 발생하면 예외를 다 먹어버리도록 작성했다.
그래서
      <code />


      throw e;
코드를 추가해주었다 (예외를 다시 던져준다)
A1Dao에서 예외 처리를 다 해버리므로
A1DaoTest에서 예외가 발생하지 않는것이다 ㅋ.ㅋ
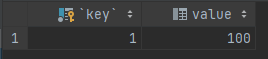
같은 트랜잭션으로 묶여있기 때문에,
(1,100)이 성공하더라도 (1,200)은 들어가지 않기 때문에
예외처리로 롤 백이 되는 것이다
트랜잭션 매니저를 직접 생성하지 않고
주입해서 실습해본다
root-context.xml에 추가
      <java />


      	<bean id="transactionManager" class="org.springframework.jdbc.datasource.DataSourceTransactionManager">
		<property name="dataSource" ref="dataSource"/>
	</bean>
	<tx:annotation-driven/>
트랜잭션 매니저를 빈으로 등록했다!
데이터트랜잭션매니저를 주입하고
트랜잭션 매니저를 생성하는 부분을 주석처리했다.
      <code />


      @RunWith(SpringJUnit4ClassRunner.class) //ac를 자동으로 만들어줌
@ContextConfiguration(locations = {"file:src/main/webapp/WEB-INF/spring/**/root-context.xml"}) //xml 경로 지정해주기
public class A1DaoTest {

    @Autowired
    A1Dao a1Dao;

    @Autowired
    DataSource ds;

    @Autowired
    DataSourceTransactionManager tm;

    @Test
    public void insertTest() throws Exception{
        //TxManager를 생성
//        PlatformTransactionManager tm = new DataSourceTransactionManager(ds);
        TransactionStatus status=tm.getTransaction(new DefaultTransactionDefinition());
        //Tx 시작
        try {
            a1Dao.deleteAll();
            a1Dao.insert(1,100);
            a1Dao.insert(2,200);
            tm.commit(status); //성공하면 커밋
        } catch (Exception e) {
            e.printStackTrace();
            tm.rollback(status); //예외가 발생하면 롤백
        } finally {
        }
    }

}
새로운 테이블 b1 하나 만듦
      <code />


      create table b1 select * from a1 where false; #테이블만 생성
create table b1 select * from a1; #테이블도 생성하고 데이터도 복사
A1Dao를 복사해서 B1Dao를 만들었다.
      <code />


      package com.fastcampus.ch3;

import org.springframework.beans.factory.annotation.Autowired;
import org.springframework.jdbc.datasource.DataSourceUtils;
import org.springframework.stereotype.Repository;

import javax.sql.DataSource;
import java.sql.Connection;
import java.sql.PreparedStatement;
import java.sql.SQLException;

@Repository
public class B1Dao {

    @Autowired
    DataSource ds;

    public int insert(int key, int value) throws Exception{
        Connection conn = null;
        PreparedStatement pstmt = null;

        try {
//            conn = ds.getConnection();
            conn= DataSourceUtils.getConnection(ds);

            pstmt = conn.prepareStatement("insert into b1 values(?,?)");
            pstmt.setInt(1,key);
            pstmt.setInt(2,value);

            return pstmt.executeUpdate();
        } catch (SQLException e) {
            e.printStackTrace();
            throw e;
        } finally {
//            close(conn,pstmt); //커넥션을 닫으면 트랜잭션이 종료되므로
            close(pstmt); //pstmt만 닫는다
            DataSourceUtils.releaseConnection(conn,ds); //트랜잭션매니저가 close할지 말지 알아서 판단
        }

    }

    private void close(AutoCloseable... acs) {
        for(AutoCloseable ac :acs)
            try { if(ac!=null) ac.close(); } catch(Exception e) { e.printStackTrace(); }
    }

    public void deleteAll() throws Exception{
        Connection conn = DataSourceUtils.getConnection(ds); //deletAll은 Tx와 별개로 동작하므로, Connection conn = ds.getConnection();으로 해야한다
        String sql="delete from a1";
        PreparedStatement pstmt = conn.prepareStatement(sql);
        pstmt.executeUpdate();
        close(pstmt);
    }
}
트랜잭션 서비스를 만들어보자
      <java />


      @Service
public class TxService {

    @Autowired
    A1Dao a1Dao;

    @Autowired
    B1Dao b1Dao;

    public void insertA1WithoutTx() throws Exception{
        a1Dao.insert(1,100);
        a1Dao.insert(1,200);
    }
}
위 코드에 대한 테스트를 만들어보자
      <code />


      @RunWith(SpringJUnit4ClassRunner.class) //ac를 자동으로 만들어줌
@ContextConfiguration(locations = {"file:src/main/webapp/WEB-INF/spring/**/root-context.xml"}) //xml 경로 지정해주기
public class TxServiceTest {
    @Autowired
    TxService txService;

    @Test
    public void insertA1WithoutTxTest() throws Exception{
        txService.insertA1WithoutTx();
    }

}
테스트를 돌리면,
커넥션이 서로 다르기때문에
트랜잭션이 제대로 안된다.
충돌 났어도 하나는 제대로 성공한다.
이번엔 WithTx를 한번 만들어보자.
@Transactional 어노테이션을 붙이면,
AOP가 위아래로 (부가 코드를) 주입을 해준다.
      <java />


      @Service
public class TxService {

    @Autowired
    A1Dao a1Dao;

    @Autowired
    B1Dao b1Dao;

    public void insertA1WithoutTx() throws Exception{
        a1Dao.insert(1,100);
        a1Dao.insert(1,200);
    }

//    @Transactional(rollbackFor = Exception.class) //이 어노테이션이 있어야 Exception과 그 자손들이 롤백이 된다.
    @Transactional //RuntimeException, Error만 rollback한다.
    public void insertA1WithTxFail() throws Exception{
        a1Dao.insert(1,100); //성공
        a1Dao.insert(1,200); //실패
    }

    @Transactional
    public void insertA1WithTxSuccess() throws Exception{
        a1Dao.insert(1,100);
        a1Dao.insert(2,200);
    }
}
      <code />


      @RunWith(SpringJUnit4ClassRunner.class) //ac를 자동으로 만들어줌
@ContextConfiguration(locations = {"file:src/main/webapp/WEB-INF/spring/**/root-context.xml"}) //xml 경로 지정해주기
public class TxServiceTest {
    @Autowired
    TxService txService;

    @Test
    public void insertA1WithoutTxTest() throws Exception{
        txService.insertA1WithTxFail();
    }

}
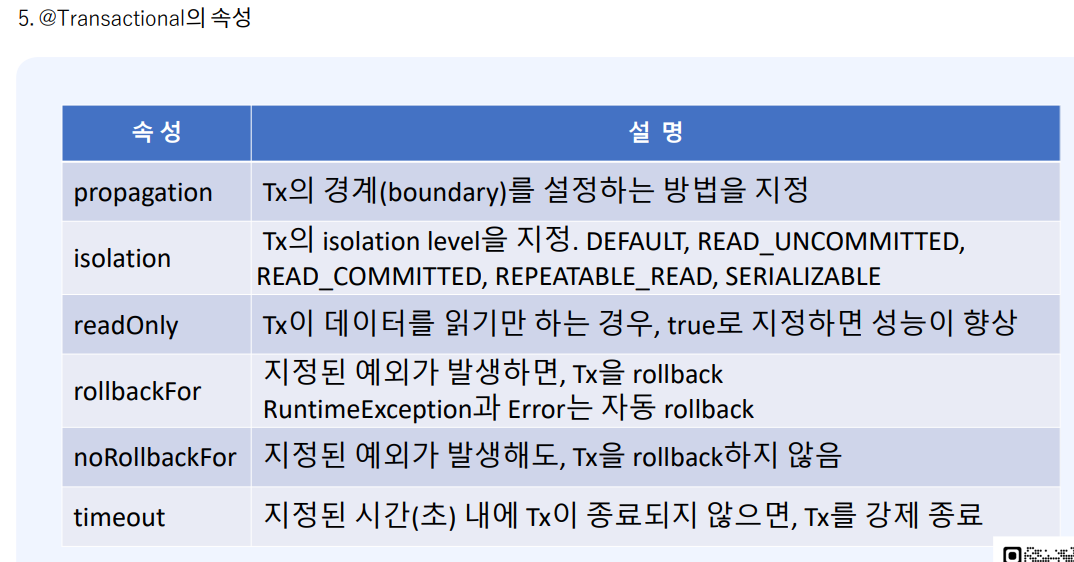
isolation의 default는 DB의 설정을 따른다는 것
rollbackFor 와 noRollbackFor는 반대이다
propgation 설명!
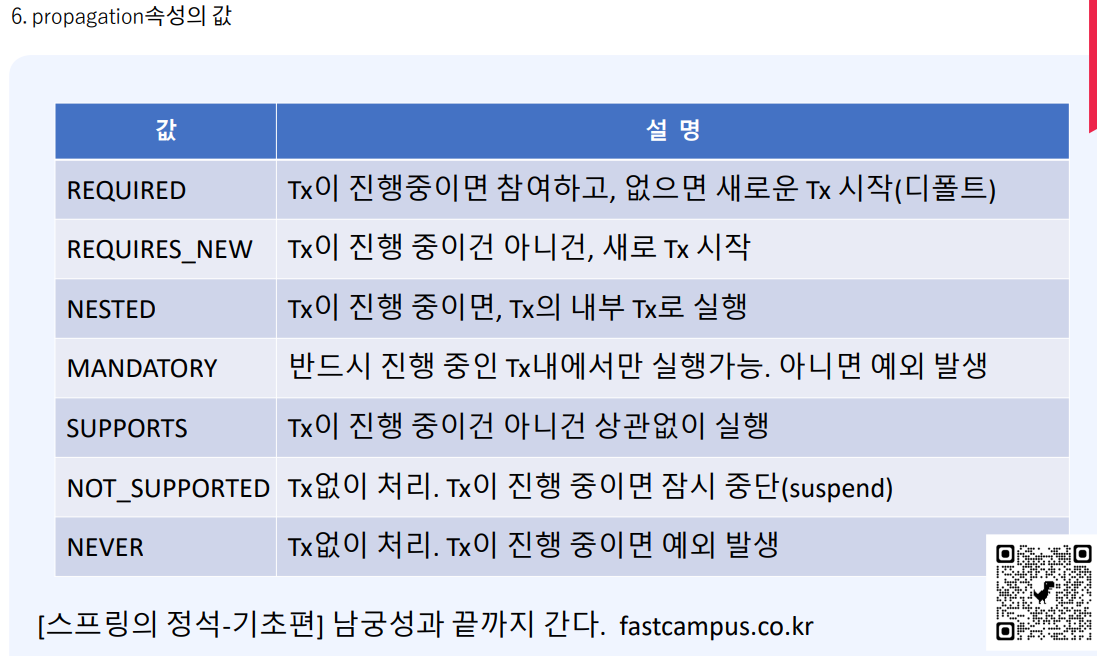
Requires_new는 TX안에 다른 TX
Nested는 TX안에 SUB TX - 같은 TX
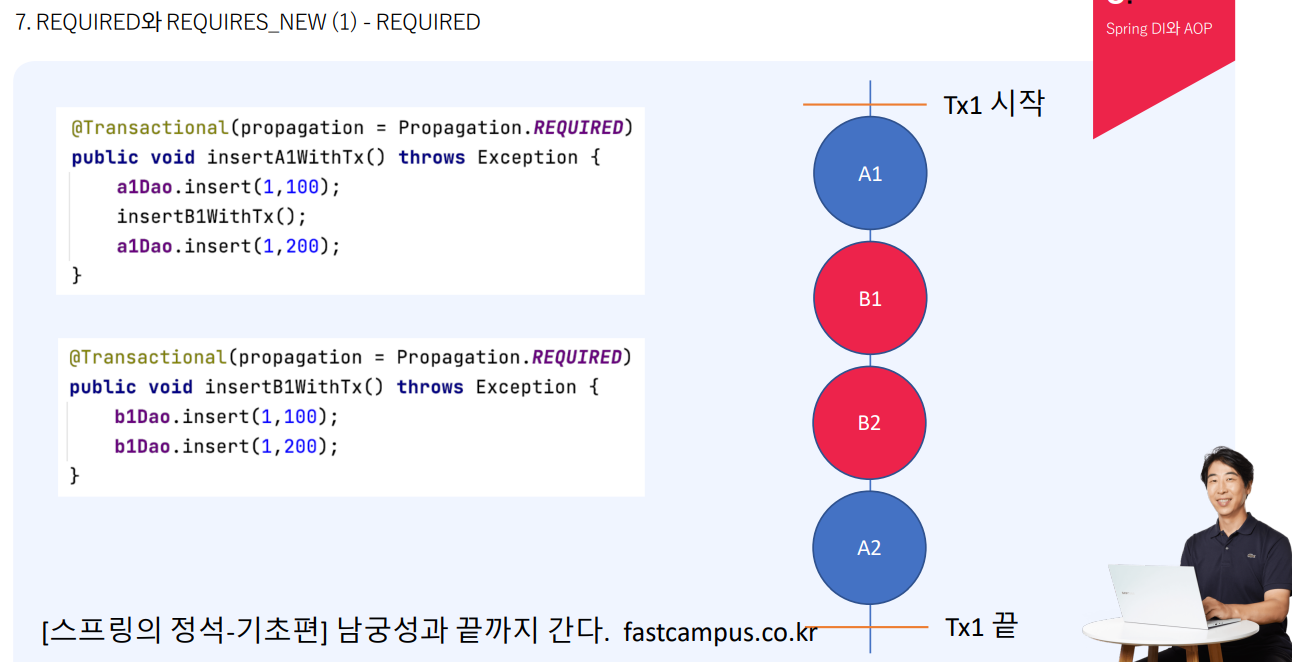
위 상자가 아래 상자를 호출한다
REQUIRED는 TX가 기존에 있으면 새로 TX를 만들지 않는다.
만약 B2에서 에러가 나면 TX1 시작 부분으로 롤백이 된다.
그러므로 TX의 경계가 무척 중요하다.
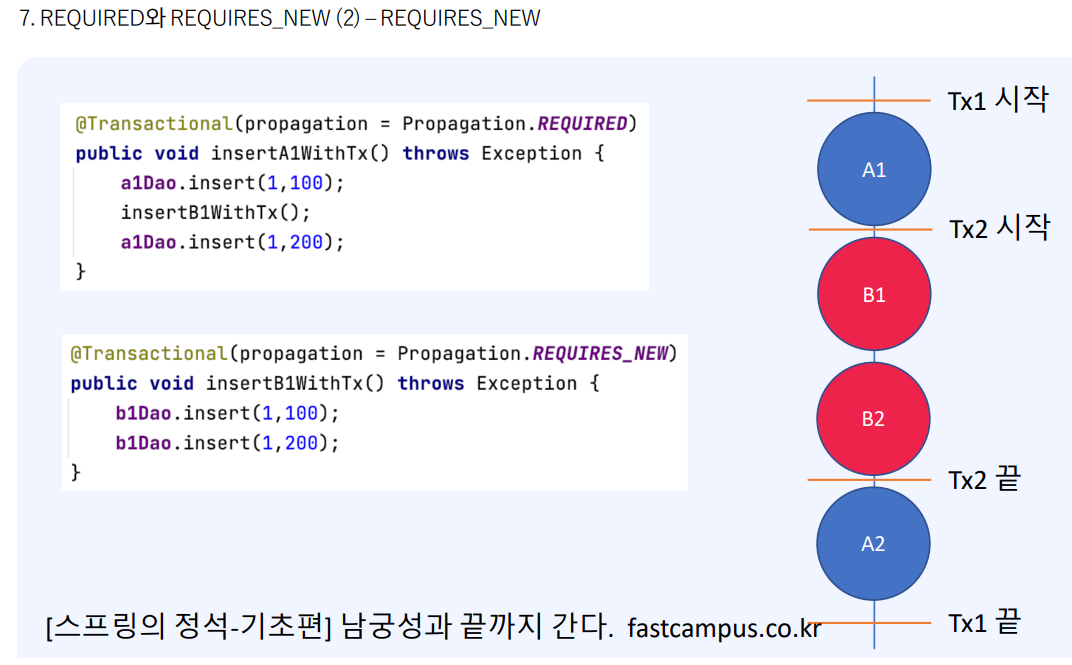
REQUIRES_NEW는 새로운 TX가 필요하다는 것이다.
B1시작 전 새로운 트랜잭션2가 시작되기 때문에,
두개의 트랜잭션이 있는것이다.
만약 B2에서 예외가 발생한다면
TX2시작쪽으로 롤백하는 것이다.
만약 A2에서 에러가 생겼다면
TX1시작쪽으로 롤백한다.
작업 B1,B2까지 취소되지 않고 커밋이 된다.(별도의 트랜잭션이기 때문에..)
실습!
      <java />


      @Service
public class TxService {

    @Autowired
    A1Dao a1Dao;

    @Autowired
    B1Dao b1Dao;

    @Transactional(propagation = Propagation.REQUIRED, rollbackFor = Exception.class) //하나의 트랜잭션 안에 묶임
    public void insertA1WithTx() throws Exception{
        a1Dao.insert(1,100); //성공
        insertB1WithTx();
        a1Dao.insert(2,100); //성공
    }

    @Transactional(propagation = Propagation.REQUIRED, rollbackFor = Exception.class)
    public void insertB1WithTx() throws Exception {
        b1Dao.insert(1,100); //성공
        b1Dao.insert(1,200); //실패
    }
      <code />


      @RunWith(SpringJUnit4ClassRunner.class) //ac를 자동으로 만들어줌
@ContextConfiguration(locations = {"file:src/main/webapp/WEB-INF/spring/**/root-context.xml"}) //xml 경로 지정해주기
public class TxServiceTest {
    @Autowired
    TxService txService;

    @Test
    public void insertA1WithoutTxTest() throws Exception{
        txService.insertA1WithTx();
    }

}
a1, b1 둘 다 아무런 데이터가 들어가지 않는다
      <code />


      @Transactional(propagation = Propagation.REQUIRED, rollbackFor = Exception.class) //하나의 트랜잭션 안에 묶임
public void insertA1WithTx() throws Exception{
    a1Dao.insert(1,100); //성공
    insertB1WithTx();
    a1Dao.insert(1,100); //실패
}

@Transactional(propagation = Propagation.REQUIRED, rollbackFor = Exception.class)
public void insertB1WithTx() throws Exception {
    b1Dao.insert(1,100); //성공
    b1Dao.insert(1,200); //성공
}
이번에도 a1, b1 둘 다 아무런 데이터가 들어가지 않는다
두개 다 하나의 트랜잭션에 묶여버렸기 때문에
A1 -> 트랜잭션 경계선 B1 B2 트랜잭션 경계선 -> A2
      <code />


      @Transactional(propagation = Propagation.REQUIRED, rollbackFor = Exception.class) //하나의 트랜잭션 안에 묶임
public void insertA1WithTx() throws Exception{
    a1Dao.insert(1,100); //성공
    insertB1WithTx();
    a1Dao.insert(2,200); //성공
}

@Transactional(propagation = Propagation.REQUIRES_NEW, rollbackFor = Exception.class)
public void insertB1WithTx() throws Exception {
    b1Dao.insert(1,100); //성공
    b1Dao.insert(1,200); //실패
}
a1에만 데이터가 들어간다
@Transactional이 동작하지 않는 이유는 같은 클래스에 속한 메서드끼리의 호출(내부 호출)이기 때문
프록시방식(디폴트)의 aop는 내부호출인 경우, advice가 적용되지 않음.
그래서 tx가 적용되지 않는 것임.
두 메서드를 별도의 클래스로 분리하면 tx가 적용됨.
근본적인 해결은 프록시 방식이 아닌 다른 방식을 사용해야함.
'패캠 챌린지' 카테고리의 다른 글
| MaBatis로 DAO작성하기 (0) | 2023.05.11 |
|---|---|
| MyBatis (0) | 2023.04.28 |
| AOP (0) | 2023.04.04 |
| Transaction, Commit, Rollback (0) | 2023.04.03 |
| DAO의 작성과 적용 (0) | 2023.03.30 |